yuuvis® Postman Collections
Postman is a free API development tool with a multitude of useful functions for automated testing, documentation, and more. Our yuuvis® Postman Collections kick-start you right into the yuuvis® API world.
Table of Contents
Introduction
The following article explains how to use our prepared collections and how to get started using the yuuvis® API.
What Is Postman?
Postman is a free API development tool with a multitude of useful functions for automated testing, documentation, and more.
How Is Postman Used With yuuvis®?
For yuuvis®, Postman serves as a platform for trying out the endpoints of the API and understanding how all the tools that you have at your disposal work. We have provided a Postman Collection, which can be imported in any Postman application and includes all endpoints in Postman's API client interface. After a quick configuration of the collection's environment you can get started sending requests to the yuuvis® API, importing documents, modifying and retrieving them. Of course, your access to some endpoints may be limited by your license or custom permissions.
This resource is especially useful for newcomers to yuuvis® to get to grips with how each endpoint is handled (i.e., what headers need to be supplied, how request bodies are set up etc.), before implementing the endpoint requests in their own yuuvis® clients. However, the collection can still come in handy for more seasoned developers, as it provides quick access to API functions one would normally not automate (downloading the current tenant schema for example) and delivers a comfortable environment for API exploration.
Requirements
You need a running and accessible yuuvis® Momentum installation - for example a test installation.
Postman Resources
yuuvis® Momentum Postman Collection
Configuring the Postman Collection
Now that you have downloaded the Postman Collection json file and Postman is installed on your computer, you are almost ready to get started trying yuuvis® endpoints. Follow these steps to get started:
Importing the JSON file
After opening postman and passing the login, an 'import' button appears right next to the orange 'New' button in the top left corner. It can be used to import our collection.
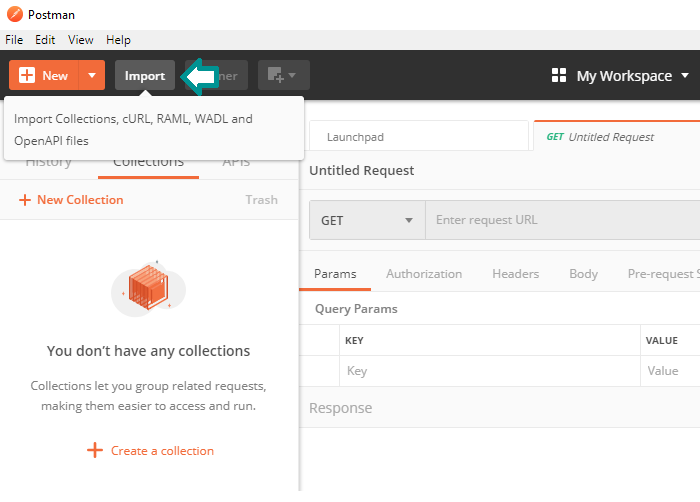
Once the button is clicked, a pop up appears asking which files are to be imported.

Either drag and drop the yuuvis® .postman_collection.json file into the designated area or click the 'Choose Files' button to select the file from your file system.
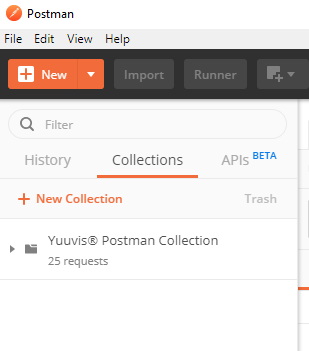
Once done, it should look something like the image above. Before we can start using the included Postman requests, we need to continue by configuring our API subscription key in the collection's environment.
Configuring API Access Credentials
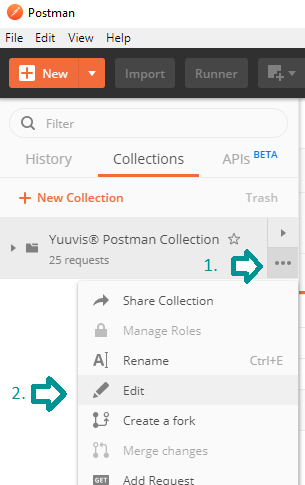
To access the collection's variable environment, hover over the Collection and click the '…' button to expand the settings list. Then click the 'Edit' option to open the edit menu.
From here, navigate to the 'Variables' tab of the now opened edit menu. Here, you can enter your access credentials (tenant, user name and password) in the provided fields so they will automatically be used in the calls of the collection. Importantly, the 'ip' variable must define the base URL of your yuuvis® Momentum system including the transfer protocol but excluding a trailing slash, as in 'https://mymomentum'.
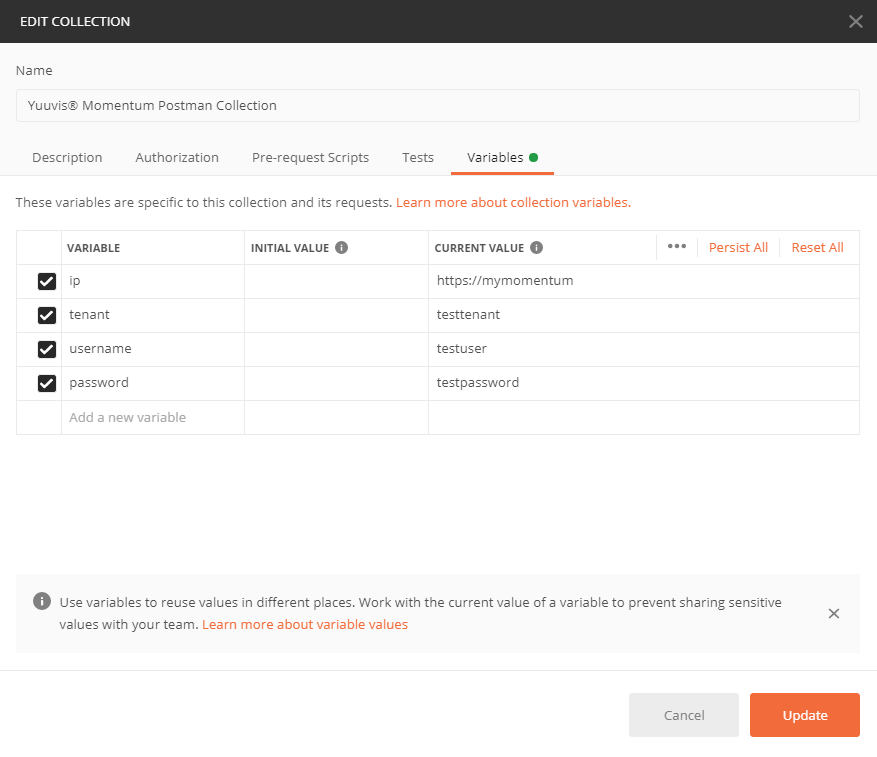
Persist the variables to make sure the values entered will be used in the collection scope, then click 'Update' to finish the Postman collection configuration. Alternatively, the variables can also be configured outside of the collection in the Postman Environments view.
Jumping Into Your First Requests
Let's now use our newly configured collection to import our first document. That request should be at the top of the list when the collection is expanded in the left-hand navigation panel.
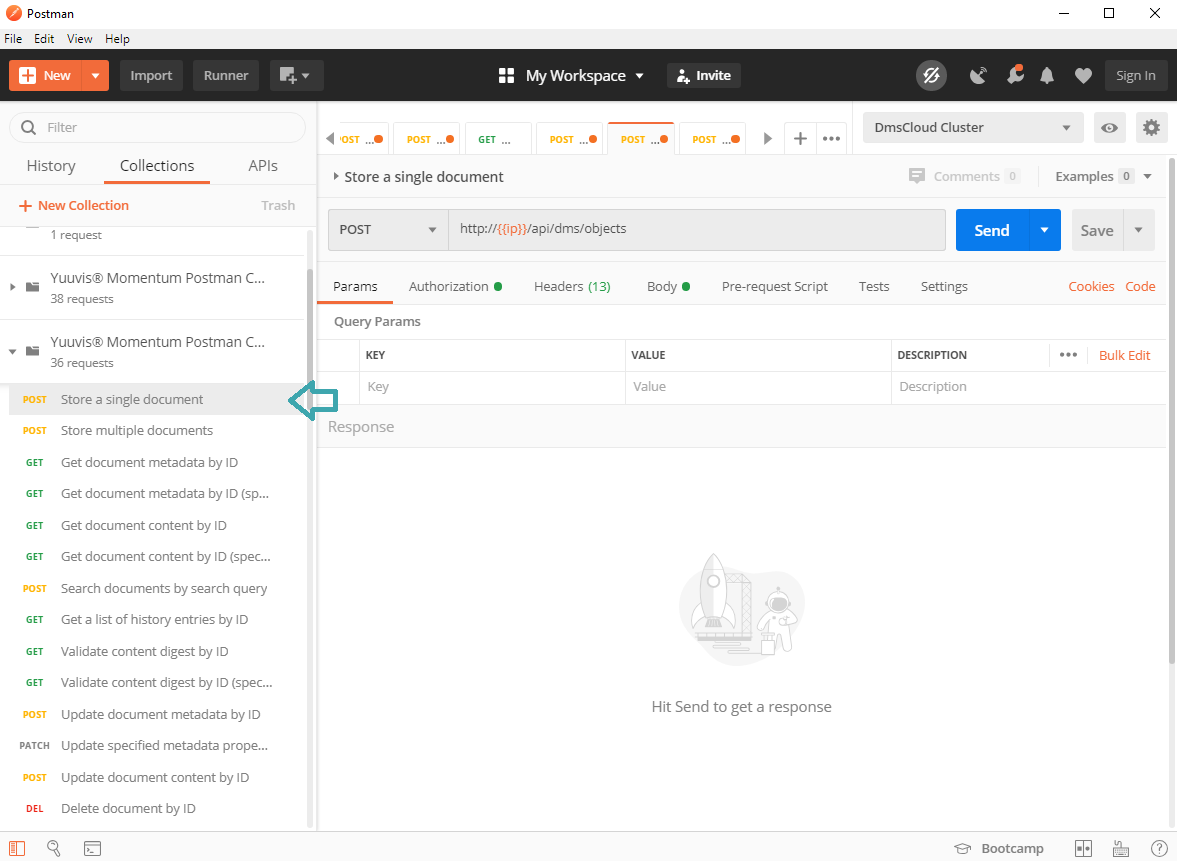
In the central API client interface, we can now see what makes up our import request. We already find the 'ip' variable from before being used for building the endpoint's URL. From here, we can navigate the different tabs to find out more and prepare the request.
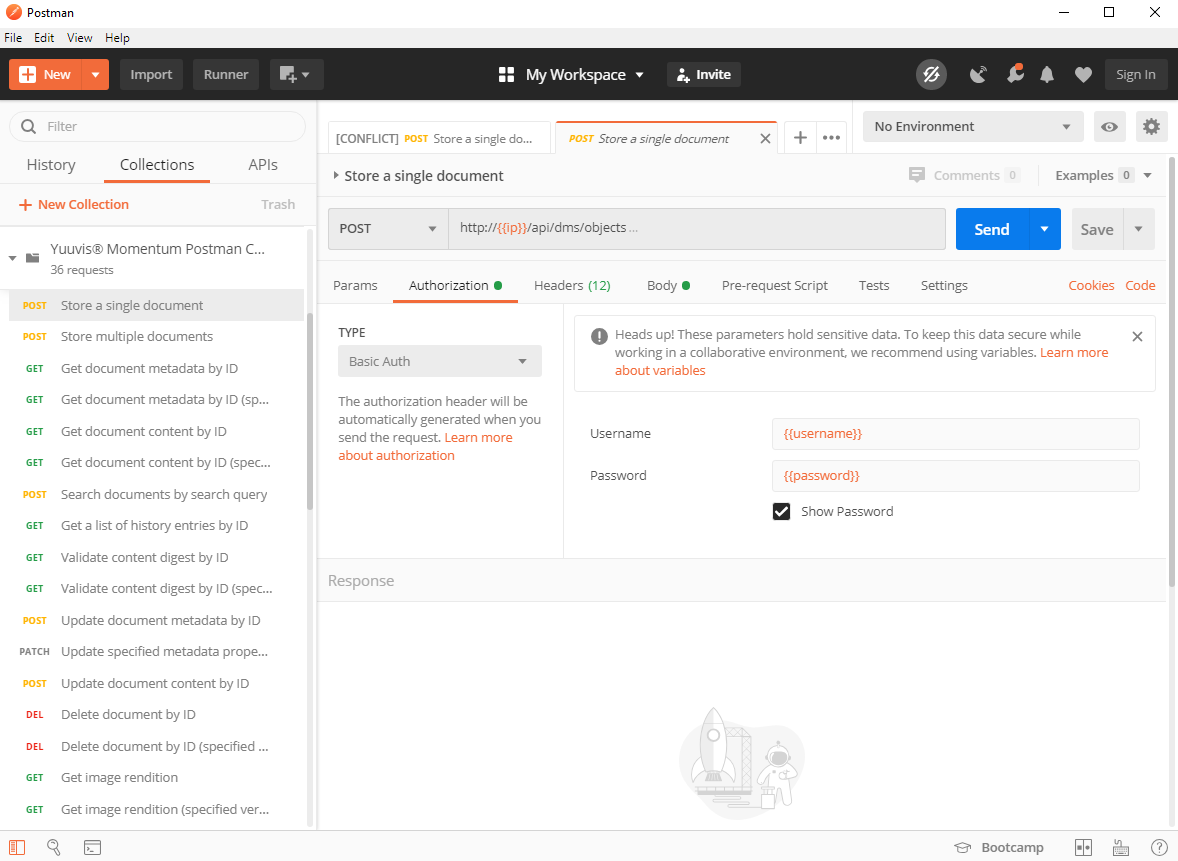
For instance, we can navigate to the Authentication tab to see how our provided credentials end up being used in a Basic Authentication setup.
Heading over to the 'Headers' tab of the request, we see where our provided tenant ends up. In case of this particular endpoint, we also find out which type of content the API expects (multipart/form).

In the 'Body' tab, we can see a prepared single-document import setup. We now need to provide the parts for the request body.

For the body part titled 'data', a yuuvis® style metadata file is required. You can use this one from our Postman Collection repository or create your own.
The other body part (titled correspondingly to the content stream ID specified in the metadata file) will accept any file you want to upload.
After setting up the files, the request is good to go against the yuuvis® API. Click the 'Send' button to send the request.
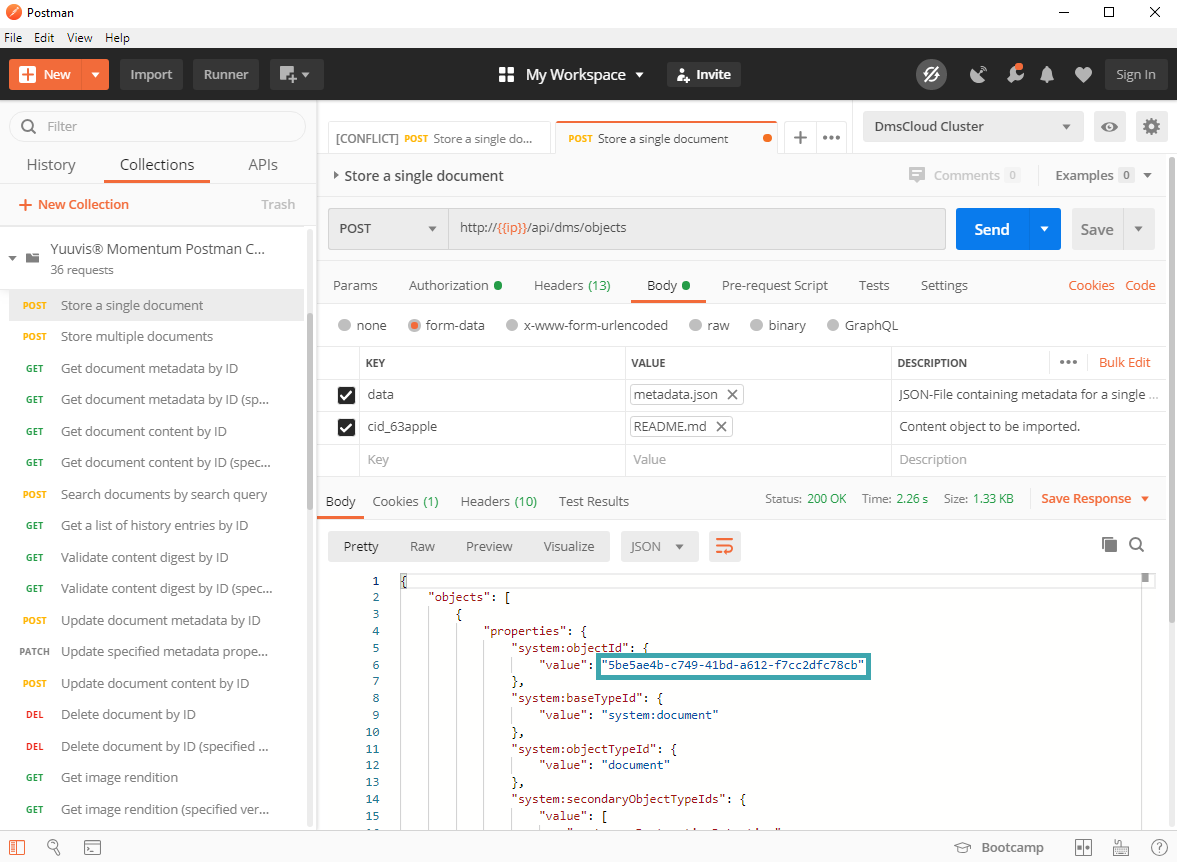
The response portion of the screen will display the complete set of metadata that was created for your new object, including the objectId (marked in the screenshot) which you can use with other endpoints to interact with the object.