Test System Installation Guide
This tutorial explains step by step how to install a yuuvis® API system for testing purposes. To learn about Kubernetes, visit https://www.redhat.com/en/topics/containers/what-is-kubernetes
Table of Contents
Introduction
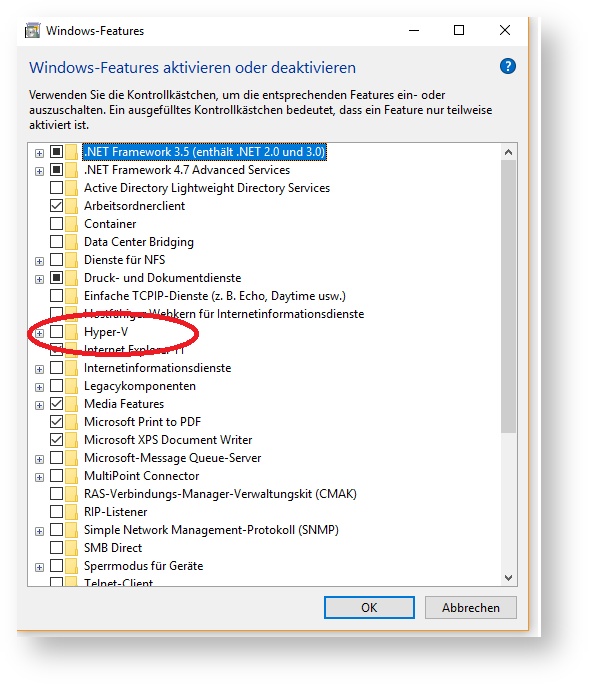
The cluster can run on any hosted or local environment supporting Kubernetes, which include many of the IaaS-Products of the major players in the cloud business, such as Amazons EKS (Elastic Container Service for Kubernetes) or Google’s Kubernetes Engine. For testing purposes, however, the use of Minikube is recommended. To run Minikube either Hyper-V or VirtualBox must be installed. This Tutorial uses VirtualBox. How to install Minikube is described here.
Any cluster running the yuuvis® API infrastructure will also require at least 8GB of RAM, with production workloads possibly requiring far more resources.
The installation of the micro service infrastructure on the cluster will be done with the package manager Helm. How to install Helm is described here. Make sure that your PATH contains the location of the helm.exe included in the binary downloaded from Github, then execute .
helm repo add stable https://kubernetes-charts.storage.googleapis.com/
To deploy and manage applications on Kubernetes the Kubernetes command-line tool called kubectl is required. Installation and usage is described here.
After everything has been installed and deployed, the running system can be tested with Postman.
Setting up a Minikube VM
Launching Minikube will boot a virtual machine running a single-node Kubernetes cluster. You can use any version of Hypervisor Hyper-V or Virtualbox as the environment for the virtual machine. This installation guide was authored using the open-source software Virtualbox, so it is recommended that you work with this software as well. If you have used Hyper-V in the past and now want to use Virtualbox for your Kubernetes purposes, be aware that it is not possible to use both Hyper-V and Virtualbox at the same time. You will have to deactivate one or the other. It is possible that Minikube will run into trouble accessing its working directory if that working directory has been placed in the User directory. If you run into this problem, simply move the MINIKUBE_HOME environment variable to a more permissible place in your file system. When starting Minikube for the first time, you can pass parameters to the virtual machine that will be created. For example, to start a VM with 4 cores, 12GB of RAM and 60GB of hard drive space, use this command: Once the VM has been created on the first startup, these settings will be repeated on the next "minikube start". Common Minikube commands: command effect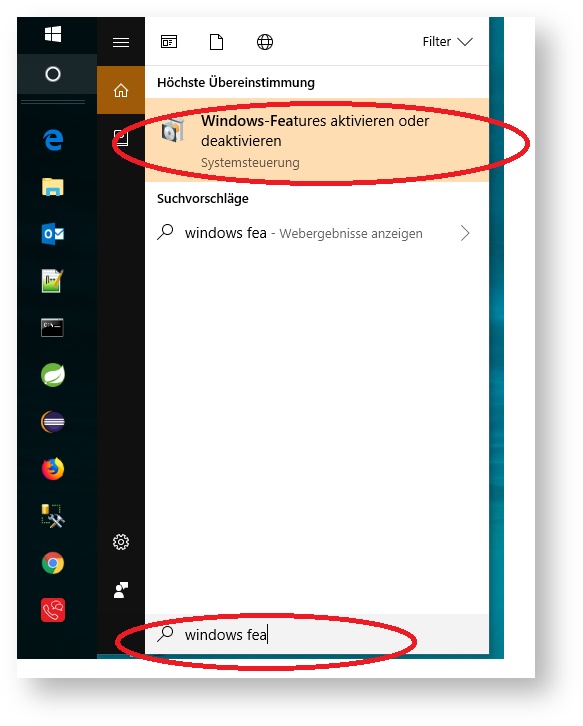
minikube start --memory 12288 --cpus 4 --disk-size 60gminikube start starts the virtual machine minikube stop pauses the virtual machine minikube status status of the virtual machine minikube delete deletes the virtual machine minikube ip shows the IP used by the virtual machine minikube dashboard opens the Kubernetes dashboard in the standard browser minikube help shows all commands
Applying the Helm Charts
This tutorial explains how to use the Kubernetes package manager Helm to install the yuuvis® Momentum microservice infrastructure on a Kubernetes cluster.
Testing with Postman
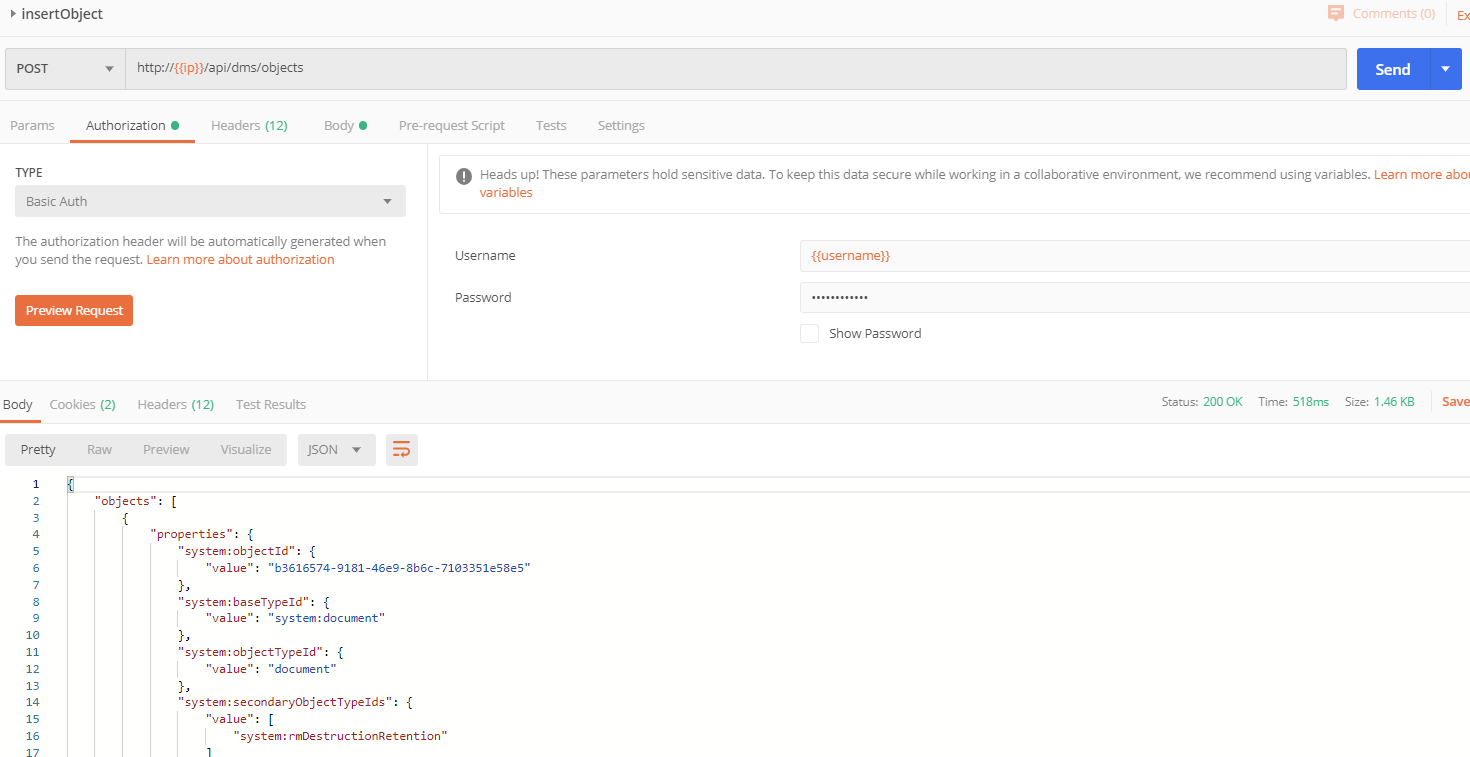
Having completed the cluster setup, we can move on to testing our installation to see if everything is working properly. For this purpose, a Postman Collection containing Momentum's major endpoints has been prepared. Import the test collection in Postman by opening the import dialog ( Configure the environment of the Postman collection by adding values to the provided variable structure. Select the imported environment and configure it for connections to the cluster. Since all calls to the Core API must travel via the authentication service, we configure the For all requests: In the 'Authorization' tab configure the authentication type "Basic Auth" with user name "root" and password "optimal" to ensure the test requests will pass through the authentication service. Depending on the authentication service configuration, this may or may not be required. For POST requests: Add the payload files to the body of the request. Each test will provide some form of description which will point out what files to select. After a successful POST call, the API will return the objectId of the newly created object. This objectId can be used for upcoming tests requiring an object ID as a URL parameter. For GET requests: Configure the CTRL+O or via the Collections tab on the left-hand side of Postman) and drag the "yuuvis® Momentum Postman Collection.postman_collection.json" file into the designated area.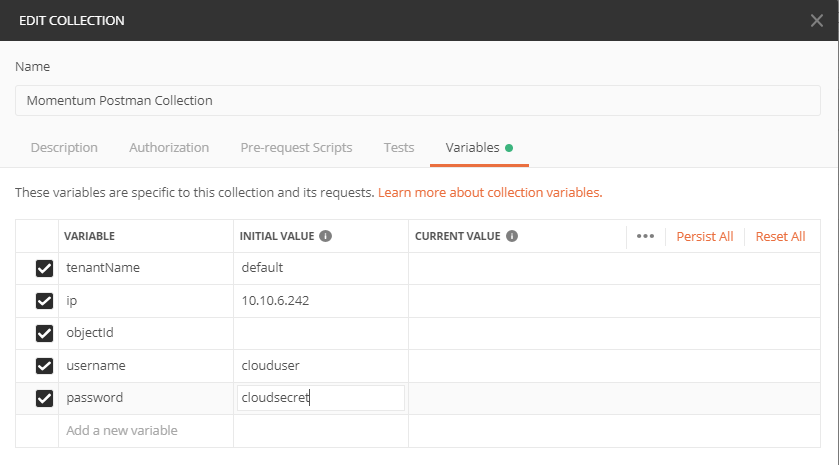
ip environment variable with the URL of the authentication service as its value. Both "initial value" and "current value" are to be filled in with that URL.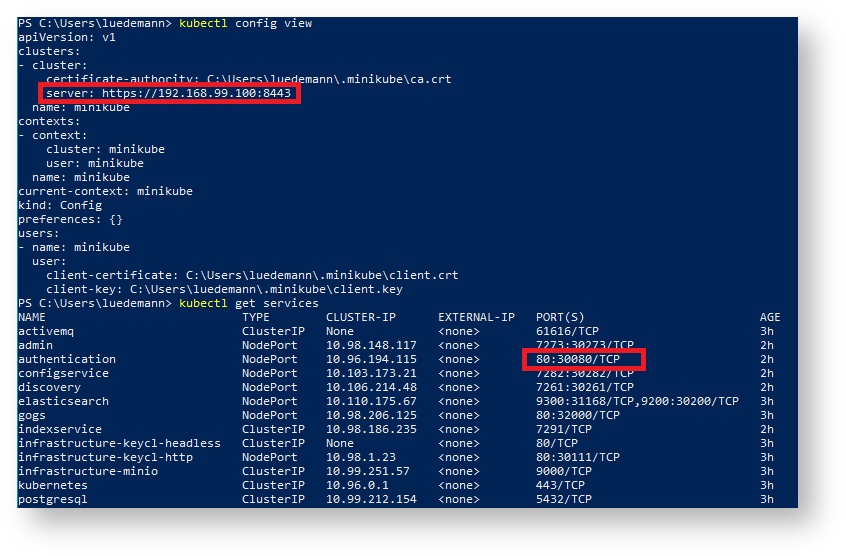
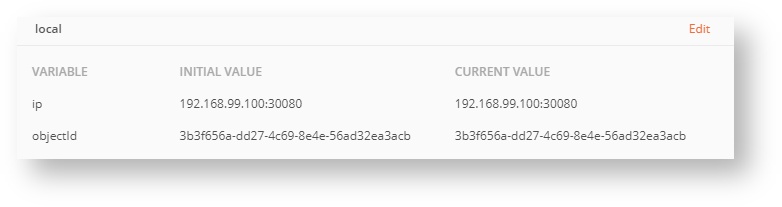
objectId variable in the imported environment and set its value to the object ID returned by one of the successful POST tests.