Customizing the Client
The client was created to be highly extensible. Developers can use our development tools to customize nearly every aspect of the base application. We stayed close to the tooling and best practices used by the Angular community. Our base development tool enaio CLI extends the Angular CLI used by many Angular developers. Anyone used to the Angular CLI will be able to use our enaio CLI without problems.
Customizing by Configuration
Some parts of the standard client can be changed by configuration, these are
- The application language files
English and German are delivered by default. Feel free to translate these into further languages which are supported including the correct formatting of data like numbers and dates. - The link to the user documentation
In this case, users are not allowed to access the internet, you can ask for an offline version of the documentation. This way, you can give users access to the documentation via your intranet. The URL to the documentation in the client has to be changed. - Background image of the start page and image of the sidebar
In case you want to display your own start page image as well as the image of the sidebar/about page, you can change it this way. - Title of the home screen
In case you want to display a different component name in the title of the browser tab of the dashboard to match the component name on the About page, you can change it this way. - Application logo ‚yuuvis‘
In case you want to display your own application logo, you can change it this way. - The About page
You can change the image, intro text, component name, documentation link, and license text.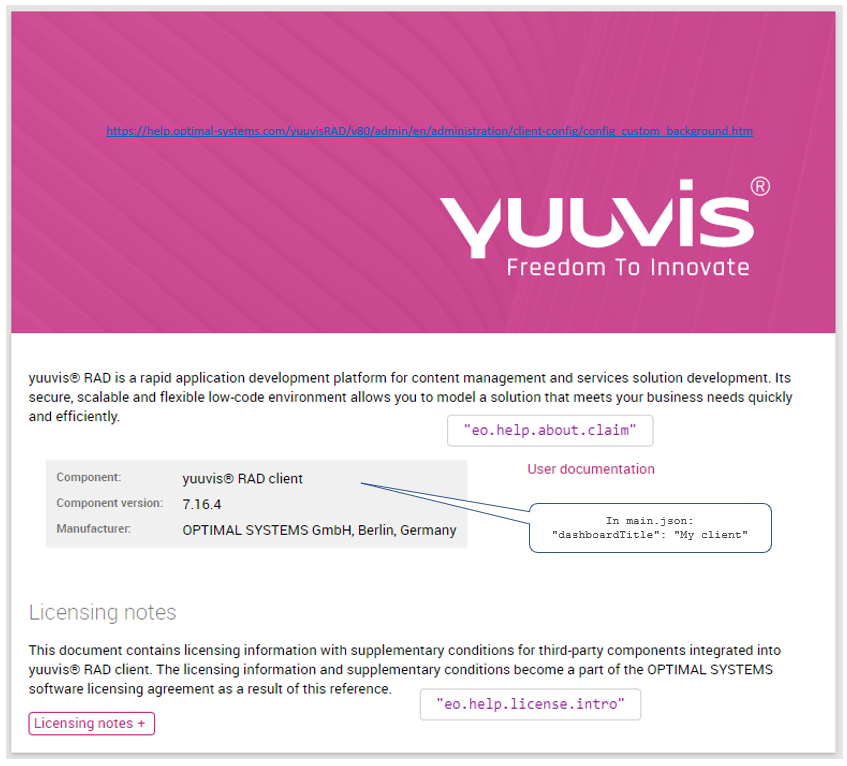
- Intro on the About page
In case you want to change the intro text on the About page, you can do so by modifying the value of theeo.help.about.claimkey in the language file of the client, e.g., en.json,. For more information on application langguages, refer to to this page. - License disclaimer on the About page
In case you want to change the license disclaimer on the About page, you can do so by modifying the value of theeo.help.license.introkey in the language file of the client, e.g., en.json. For mor information on application languges, refer to this page.
- Intro on the About page
Customizing by Developing your own Plug-ins or Clients
In the following, two more ways to develop an individual client are documented. We call this a custom client. The first way is to develop plug-ins and hook them into standard client open sources. The second way is to develop an entirely new client. In this way, you use only the core component which supports you with a client API which itself is documented per version here.
Custom Client: Extending the Standard Client Open Sources with Plug-ins
These are the places in the client where plug-ins can be hooked in:
- Object details area
This area is part of all client views and offers the aspect Overview, Metadata, History, References and Content. So hook a new aspect with special business logic into it, e.g., Google maps showing the place a photo was taken or an employee lives, or showing the route a service manager has to take for a service. - List area in the object view
The object state shows three areas, if a context folder is relevant. The list is the middle part and shows the last modified objects of the folder after opening an object. A second list with the name 'Last viewed' can be focused which shows all objects the user has viewed the last time. It is possible to hook in another list here which could be something like the context folder cover sheet. In case of a personal file, you may want to display the profile picture of the user here, or whether the user is on vacation and until when, or whether he is on sick leave. - Object actions menu
The three-dots menu of the object details area as well in the result lists offers all available actions which can be executed for the selected object(s) in their state and depending on the rights of the user. So hook another action here to call your specific functions, e.g., to call an application to edit the document file or to open another view like a gallery for images. - Main menu
The main menu offers all actions used to open those views of the client which are set by the capabilities settings. So hook another action here which should open a custom state as described below. - Application state
The client has the following standard states: Favorites, Inbox, In-Tray, My Processes, Notifications and Saved searches. If you create another custom state, a new main menu action is hooked as well. Custom states may show statistical information the user needs, or a gallery view with all document files that are capture photos and were marked in a list and for which the plug-in action Open in gallery was called.
Custom Client: Building a New Client Using the Core Component
In the case the user is supposed to use a client with a small set of functions or a special logic, and with a special look and feel, you can build a completely new client nearly from scratch. The core component helps by offering a complete client API with lots of optimized system calls.
Or you may only want to change some colors and fonts. Then take the standard client open sources and configure them. See the second tutorial of this series: Theming the web client.
And now you may dive into building a custom client step by step: